
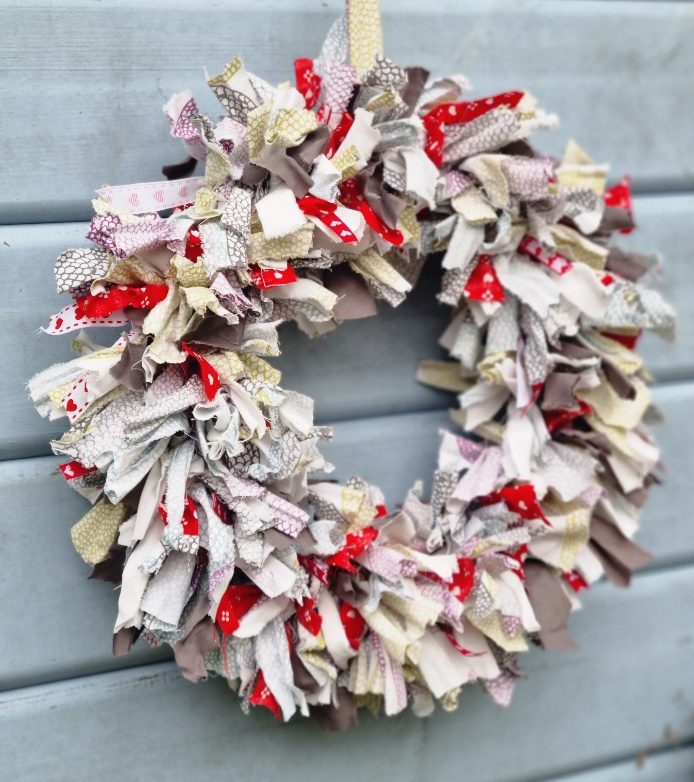
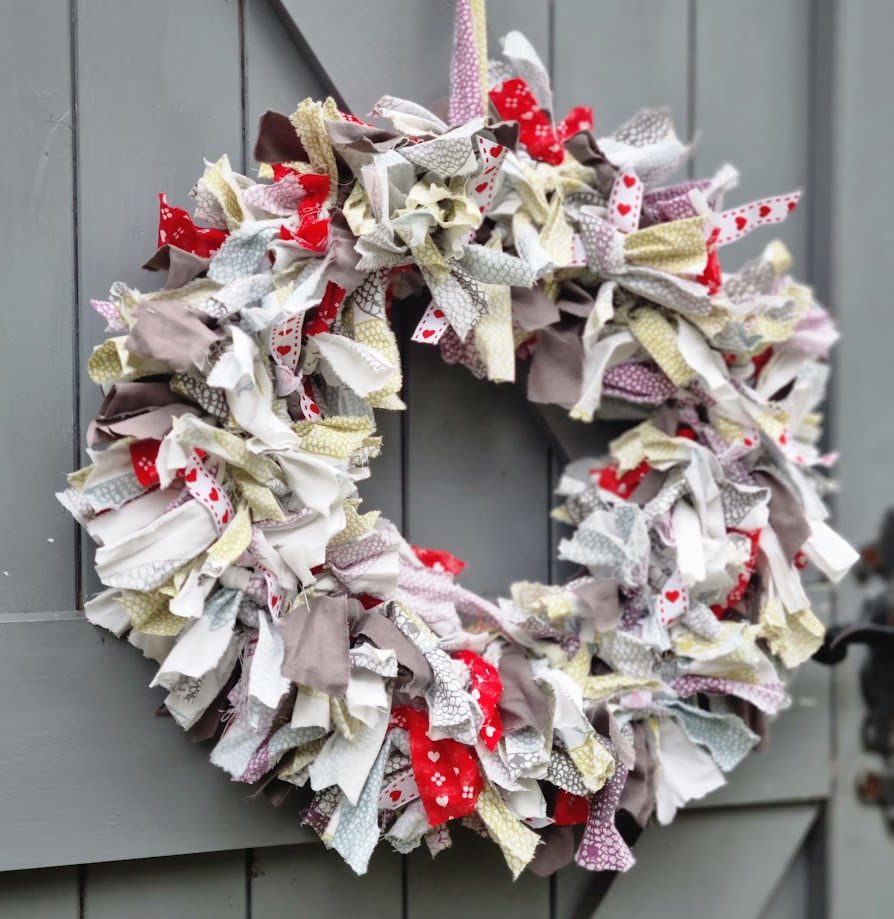
As you know, we are huge fans of upcycling here at Hyggestyle so we thought we would share with you an easy-peasy way to decorate your home for the festive season using an old double duvet cover and some fabric scraps! Today I’ll show you a super quick way of making a gorgeous front door wreath, created from bedding; I have used sheets and old curtains from the back of the laundry cupboard before but this lovely grey one was only £4 from the local charity shop, while the pieces of red fabric were a steal at £2; it’s also a great way of getting kids involved as they love taking out all their energy by tearing up the material!
You will also need a 12 inch metal wreath frame, so if you kept your foliage door wreath from last year, you can just strip off all the dead leaves and use that. However a wire coat hanger makes a great base as well; if you snip the hook off with cutters just where it becomes the shoulders of the hanger, you will find it much easier to straighten the length of wire then shape it into a proper circle. Attach the two ends back together securely with masking tape, and then tape the hook back on if you wish.
- For the wreath, you will need roughly 8 x 50cm squares torn from your cover, plus any old bits of ribbon or pretty scraps you have lying about in order to add a little extra colour. Start by ripping the duvet cover into two separate halves, then tear off any seams.
- Tear the fabric into 50cm squares to make it more manageable; I find it easiest to start the rip with a little snip with sharp scissors.
- Taking one of the squares, make a series of cuts along one edge at intervals of 3-4 centimetres, then pull it into strips.
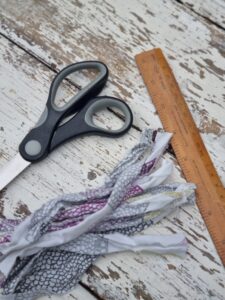
- Set aside one 50cm strip for hanging the wreath later. Lay the strips together in a neat bundle then cut the bundle into three equal piles; essentially we are looking to create pieces that are roughly 15-16cms long and 3-4cms wide but it isn’t an exact size and a little variation in size will add texture.
- Repeat with the other 7 squares, plus any ribbon and scraps.
- If your wreath has segments, divide the strips into the appropriate number of bundle (mine had five main segments, so I split the colours roughly evenly into five piles).
- Start to attach the strips by looping each one under one of the wires and just knotting just once to hold it in place; make sure the right side of the fabric is facing up so that once knotted it will still look bright and pretty!)

- Continue to knot until the whole frame is covered.
- Turn it over and using a pencil poke any stray strips back through the frame so they pop back out towards the front.
- Take the long strip we set aside earlier, poke it through the frame and back out again before knotting both ends into a long loop to make a hanger. Give the wreath a trim to tidy up any longer pieces and pull away any loose threads, et voila, your very own upcycled wreath!

Hang onto the rest of the fabric as next week we will making gorgeous fabric tinsel and some very easy baubles to finish off your look! x